Twitter cards are a powerful tool for businesses and content creators to increase engagement and drive traffic to their websites. These cards allow you to provide additional information and rich media, such as images, videos, and summaries, directly in your tweets. However, getting your Twitter cards validated can be a daunting task for many.
In this blog post, we will walk you through 10 easy steps to validate your Twitter card and boost engagement with your audience. Whether you are a seasoned Twitter user or just getting started, these tips will help you make the most out of this valuable feature. Let’s get started!

The benefits of validating your Twitter Card
Validating your Twitter card offers several benefits that can greatly enhance your engagement on the platform. Here are some of the key advantages:
1. Increased visibility:
By validating your Twitter card, you ensure that your tweets stand out from the crowd. Twitter users are more likely to engage with tweets that include rich media, such as images, videos, or summaries. Validating your card allows you to make use of these features, thus increasing the visibility of your tweets and attracting more attention from your audience.
2. Improved click-through rates:
Twitter cards allow you to provide additional information and enticing visuals, making your tweets more appealing and encouraging users to click on them. When your card is validated, it ensures that your rich media is correctly displayed, making it more likely to capture the interest of users and drive them to explore your content further.
3. Enhanced branding opportunities:
Validating your Twitter card enables you to customize the appearance of your tweets with your branding elements, such as your logo or brand colors. This helps to create a consistent and visually appealing brand presence on the platform, which can strengthen brand recognition and make your tweets more memorable to your audience.
4. Better analytics and insights:
Twitter provides detailed analytics for validated cards, allowing you to track the performance of your tweets more effectively. You can gain insights into metrics such as impressions, engagements, and click-through rates, enabling you to measure the impact of your Twitter card and make informed decisions to optimize your content strategy.
5. Increased website traffic:
Validating your Twitter card enables you to include a call-to-action button in your tweets, such as “Learn More” or “Buy Now.” This allows you to direct users to a specific landing page on your website, driving traffic and potentially converting them into customers or leads.
6. Integration with other platforms:
Validated Twitter cards can also be used in conjunction with other platforms, such as Facebook or LinkedIn, through cross-posting or social media management tools. This broadens the reach of your content and ensures a consistent brand experience across multiple channels.
In summary, validating your Twitter card provides a range of benefits, including increased visibility, improved click-through rates, enhanced branding opportunities, better analytics, increased website traffic, and integration with other platforms. By following the easy steps outlined in this blog post, you can leverage these advantages and boost engagement with your audience on Twitter.
Step 1: Sign up for a Twitter Developer Account
Before you can start validating your Twitter Card and boosting engagement, you need to sign up for a Twitter Developer Account. This account will grant you access to the tools and resources needed to create and manage your Twitter Cards.

Here’s how to set up your Twitter Developer Account:
1. Go to the Twitter Developer website:
Start by visiting the Twitter Developer website at developer.twitter.com. Here, you’ll find all the information and resources you need to get started.
2. Sign in with your Twitter Account:
- Click on the “Sign in” button located in the top right corner of the page.
- You’ll be prompted to enter your Twitter login credentials. If you don’t have a Twitter account, you’ll need to create one before proceeding.
- Apply for a Developer Account: Once you’re signed in, click on your profile picture on the top right corner of the page, and select “Apps” from the dropdown menu. On the next screen, click on the “Create an app” button.
- Fill in the required information: You’ll be asked to provide some information about your app, such as the name, description, and website URL. Make sure to accurately fill in all the required fields.
- Review and accept the terms: After you’ve filled in the information, review the terms and conditions, and check the box to indicate that you agree to them. Then, click on the “Create” button.
- Complete the setup process: Once you’ve created your app, you’ll be taken to the app dashboard. Here, you’ll find all the settings and configurations for your app. Take some time to explore the different options and customize them according to your needs.
- Generate your API keys: In order to access the Twitter API and make requests, you’ll need to generate a set of API keys. To do this, navigate to the “Keys and Tokens” tab in your app dashboard. Click on the “Generate” button next to the Consumer API keys and Access token & access token secret sections. Make note of these keys as you’ll need them later.
Congratulations! You’ve successfully set up your Twitter Developer Account. Now you’re ready to move on to the next step: creating and validating your Twitter Card.
Read Also:
- The Power of Professional Posting Services: Time-Saving Tips
- From Zero to Hero: How to Skyrocket Your Insta Stories Views
- How to Download Instagram Videos For Free
- Viraldashboard New Feature Alert – Viral Hashtags Generator
Step 2: Create a Twitter Card
To boost engagement on Twitter, it is crucial to create a Twitter Card that will grab the attention of your audience. A Twitter Card is a feature that allows you to attach rich media, such as images, videos, or interactive content, to your tweets. This not only increases the visibility of your tweets but also provides more context and engagement opportunities for your audience.

Here are the steps to create a Twitter Card:
1. Decide on the type of Twitter Card:
Twitter offers different types of cards, including summary cards, summary cards with large images, player cards for multimedia content, and app cards for promoting mobile apps. Choose the type that best suits your content and goals.
2. Use Twitter Card Markup:
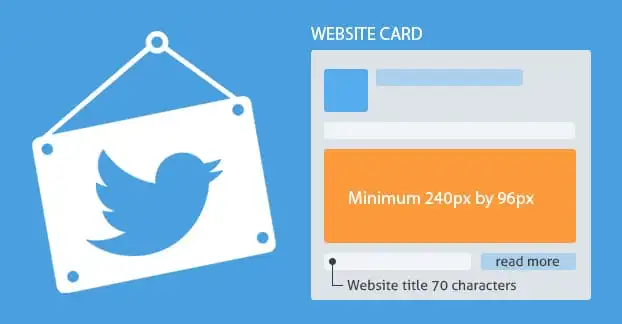
To create a Twitter Card, you need to add Twitter Card Markup to your website’s HTML code. This markup allows Twitter to read and display your card correctly. The markup includes meta tags that define the card’s title, description, image, and other relevant information.
3. Add meta tags to your page:
Insert the appropriate meta tags into the head section of your webpage’s HTML code. These tags contain the necessary information for Twitter to generate your card correctly. Make sure to include tags for the card type, title, description, and image URL.
4. Test your card:
Before you publish your Twitter Card, it is crucial to test it using Twitter’s Card Validator. This tool will ensure that your card is set up correctly and will be displayed as intended. Simply enter the URL of the page with the card markup and click the “Preview card” button to see a preview of how the card will appear.
5. Troubleshoot any issues:
If the validator identifies any issues with your card markup, make the necessary adjustments to fix them. This may involve checking for missing or incorrect meta tags, ensuring the image URL is accessible, or resolving any other technical errors.
6. Publish and promote your card:
Once your Twitter Card is working correctly, you can publish it on your website and start promoting it through your tweets. When you include a link to a web page that has a Twitter Card, Twitter will automatically populate the card in the tweet preview, providing a visually appealing and engaging experience for your audience.
Creating a Twitter Card is an effective way to boost engagement on the platform. By adding rich media and enticing descriptions, you can capture the attention of your audience and encourage them to interact with your content. Follow these steps to create a compelling Twitter Card that will drive engagement and help you achieve your marketing goals.
Step 3: Implement meta tags on your website
After creating your desired Twitter Card, the next step is to implement meta tags on your website. Meta tags are HTML tags that provide metadata about your webpage, including information such as the title, description, and image URL of the Twitter Card.

Here are the steps to implement meta tags on your website:
1. Identify the appropriate meta tags:
Depending on the type of Twitter Card you have chosen, you will need to include specific meta tags in your webpage’s HTML code. The required meta tags may include the card type, title, description, image URL, and other relevant information.
2. Insert the meta tags into the head section of your HTML code:
Open the HTML file of the webpage where you want to display the Twitter Card and locate the head section. This is typically found within the <head> </head> tags in your HTML code. Insert the meta tags within this section.
3. Define the meta tags:
Use the appropriate meta tag attributes to define the necessary information for each tag. For example, the “name” attribute is used to specify the type of the meta tag, while the “content” attribute is used to provide the actual information.
Here is an example of how the meta tags may look in your HTML code for a summary card:
“`
<meta name=”twitter:card” content=”summary” />
<meta name=”twitter:title” content=”Your Twitter Card Title” />
<meta name=”twitter:description” content=”A brief description of your Twitter Card” />
<meta name=”twitter:image” content=”URL of the image you want to display” />
“`
4. Customize the meta tags:
Replace the placeholder values in the meta tags with your own content. Make sure to provide a catchy title, a concise and engaging description, and an eye-catching image that represents your Twitter Card effectively.
5. Save and publish your updated HTML code:
Once you have implemented the meta tags, save the changes to your HTML file and republish it on your website. This will ensure that the Twitter Card metadata is accessible to Twitter’s crawlers and will be displayed correctly when your webpage is shared on the platform.
By implementing meta tags on your website, you are enabling Twitter to read and display your Twitter Card correctly. This will enhance the visibility and engagement opportunities for your tweets, ultimately helping you reach your marketing goals on the platform
Step 4: Testing your Twitter Card
After implementing the meta tags on your website, the next step in validating your Twitter Card is testing it to ensure that it is displaying correctly. Testing your Twitter Card will help you identify any issues or errors that need to be fixed before sharing it with your audience.

Here are the steps to test your Twitter Card:
1. Use Twitter Card Validator:
Twitter provides a tool called the Twitter Card Validator that allows you to test your Twitter Card. Simply access the Twitter Card Validator through your Twitter developer account or by visiting the Twitter Card Validator webpage.
2. Enter your URL:
In the Twitter Card Validator, enter the URL of the webpage where you have implemented the meta tags for your Twitter Card. Make sure to include the full URL, including the protocol (e.g., “http://” or “https://”).
3. Click “Preview card”:
Once you have entered the URL, click on the “Preview card” button. The Twitter Card Validator will then fetch the webpage and display a preview of how your Twitter Card will appear when shared on Twitter.
4. Verify the card details:
Check the preview to ensure that the card details, including the title, description, and image, are displayed correctly. Pay attention to any formatting issues or missing elements.
5. Fix any errors:
If the preview shows any errors or issues with your Twitter Card, carefully review the meta tags you have implemented and make any necessary corrections. Common errors include missing or incorrect meta tag attributes, invalid image URLs, or incomplete card information.
6. Revalidate the card:
After making the necessary corrections, re-enter the URL in the Twitter Card Validator and click on the “Preview card” button again to revalidate your Twitter Card. Repeat this process until the preview displays your Twitter Card correctly without any errors.
7. Test on Twitter:
Once you have successfully validated your Twitter Card using the Twitter Card Validator, it is also a good idea to test it directly on Twitter. Share the URL of the webpage on Twitter and check how the Twitter Card appears in the tweet. Ensure that the title, description, and image are all displayed correctly and as intended.
By testing your Twitter Card using the Twitter Card Validator and on Twitter itself, you can make sure that your Twitter Card is optimized for engagement and effectively attracts the attention of your audience. Regularly testing and validating your Twitter Card will help you boost engagement and achieve your marketing goals on the platform.
Step 5: Troubleshooting common validation issues
While validating your Twitter Card, you may encounter some common issues that prevent your card from displaying correctly. It is important to troubleshoot these issues to ensure that your Twitter Card appears as intended and effectively captures the attention of your audience.

Here are some common validation issues and ways to troubleshoot them:
1. Missing or Incorrect Meta Tag Attributes:
One of the most common validation issues is missing or incorrect meta tag attributes. Double-check that you have included all the required meta tags and that they are properly formatted. Make sure to include the necessary attributes, such as “name,” “content,” and “property,” with their corresponding values.
2. Invalid Image URLs:
Another frequent issue is invalid or broken image URLs. Ensure that the image URL you have specified in the meta tags is correct and accessible. Verify that the image is hosted on a reliable server and that it is not restricted or blocked from being displayed on Twitter.
3. Incomplete Card Information:
Your Twitter Card may not display correctly if the card information is incomplete. Check that you have provided a title, description, and image URL in your meta tags. Ensure that the text content does not exceed the character limits specified by Twitter for each card type.
4. Formatting Issues:
Pay attention to any formatting issues in the preview of your Twitter Card. Check for missing line breaks, incorrect spacing, or improper HTML tags in your meta tags. Ensure that the text is properly formatted and displayed legibly on both desktop and mobile devices.
5. Restricted Content:
Twitter has certain restrictions on the types of content that can be displayed in a Twitter Card. If your content includes sensitive or prohibited material, it may not pass validation. Review Twitter’s guidelines and policies to ensure that your content complies with their requirements.
6. Cache Issues:
Sometimes, issues with caching can interfere with the validation of your Twitter Card. If you have made recent changes to your meta tags or content, try clearing the cache of your website or use Twitter’s “Fetch New Card” feature to refresh the card information.
7. Mobile Compatibility:
Ensure that your Twitter Card is optimized for mobile devices. Test how your card appears on different mobile platforms and screen sizes to ensure that it is easily readable and visually appealing on smartphones and tablets.
By troubleshooting these common validation issues, you can ensure that your Twitter Card is successfully validated and displays correctly to your audience. Regularly check and optimize your Twitter Card to maximize engagement and achieve your marketing goals on the platform.
Step 6: Submitting your Twitter Card for approval
Once you have validated your Twitter Card and addressed any common validation issues, it’s time to submit your card for approval. This step is crucial to ensure that your card is eligible to appear in users’ timelines and maximize its engagement potential. Here’s how you can submit your Twitter Card for approval:

1. Review Twitter’s Card Validator:
Before submitting your card, make sure to review Twitter’s Card Validator tool again. This will allow you to double-check that your card’s information is correct and formatted properly. Ensure that all required meta tags, such as title, description, and image URL, are present and accurate.
2. Test Your Twitter Card:
After validating your card, test it in different scenarios to ensure that it displays correctly across devices and platforms. Use the Card Validator tool to preview how your card appears both on desktop and on mobile. Check for any formatting or display issues that may hinder the user experience.
3. Prepare Card Documentation:
Before submitting your card for approval, it’s a good idea to prepare documentation that provides additional context about your card. This documentation can help Twitter’s review team better understand the purpose and value of your card. Include details about how your card enhances user engagement and supports your marketing goals.
4. Follow Twitter’s Guidelines:
To increase your chances of approval, ensure that your card complies with Twitter’s guidelines and policies. Familiarize yourself with these guidelines and make any necessary updates to your card to ensure it meets the platform’s requirements. Pay attention to restrictions on sensitive or prohibited content that could affect approval.
5. Submit the Request:
Once you are confident that your card is properly validated and adheres to Twitter’s guidelines, it’s time to submit your request for approval. Visit the Twitter Developer Portal and navigate to the “Cards” section to initiate the submission process. Fill out the required information and provide any supporting documentation or explanations as requested.
6. Monitor Approval Status:
After you have submitted your Twitter Card for approval, monitor the status of your request. Twitter may take some time to review and approve your card, so be patient during this process. Keep an eye out for any notifications or email updates from Twitter regarding the status of your submission.
7. Optimize and Iterate:
While waiting for approval, continue to optimize and iterate on your Twitter Card to improve its performance and engagement potential. Pay attention to metrics such as click-through rates, impressions, and conversions to identify areas for improvement. Make necessary adjustments to your card’s design, content, or targeting strategy based on these insights.
By following these steps and submitting your Twitter Card for approval, you are taking a crucial step towards boosting engagement and achieving your marketing goals on the platform. Regularly monitor the performance of your card and make any necessary optimizations to drive maximum results.
Step 7: Monitor and analyze engagement metrics
Once your Twitter Card has been approved and is live on the platform, it’s important to monitor and analyze engagement metrics to understand how your card is performing and make necessary adjustments to improve its effectiveness. Here are some key engagement metrics to keep an eye on:

1. Impressions:
Impressions measure the number of times your card was displayed to Twitter users. It indicates the reach of your card and provides insights into its visibility.
2. Click-through rate (CTR):
CTR measures the percentage of impressions that resulted in a click on your card. It indicates how effective your card is at capturing users’ attention and driving them to take action.
3. Likes and Retweets:
Likes and retweets signify user engagement and interest in your card. These actions indicate that users found your content valuable and were compelled to share it with their own followers.
4. Replies and Mentions:
Replies and mentions indicate direct interactions and conversations around your card. These engagements provide valuable feedback and insights into how users are responding to your content.
5. Conversion Rate:
If your Twitter Card includes a call-to-action or leads users to a landing page, it’s important to track the conversion rate. This metric measures the percentage of users who clicked on your card and completed the desired action, such as making a purchase or signing up for a newsletter.
6. Follower Growth:
Monitoring your follower growth can help you understand the impact of your Twitter Card on attracting new followers. A significant increase in followers after the launch of your card indicates that it is resonating with your target audience.
7. Audience Demographics:
Twitter provides analytics tools that allow you to gain insights into the demographics of your card’s audience. Understanding the characteristics and interests of your audience can help you tailor your content and messaging for maximum impact.
To effectively monitor and analyze these engagement metrics, utilize Twitter’s analytics tools. These tools provide in-depth data and insights into the performance of your Twitter Card. Regularly review the metrics and look for patterns or trends to identify areas that require improvement or optimization.
Based on the metrics analysis, consider making adjustments to your card’s design, content, targeting strategy, or call-to-action to optimize engagement and achieve your marketing goals. Experiment with different variations of your card to determine what resonates best with your audience.
Remember, engagement metrics are not static, and it’s important to continuously monitor and analyze them to refine your Twitter Card strategy and drive maximum results. By actively tracking and adjusting your approach, you can ensure that your card continues to effectively engage and attract your target audience on Twitter.
Step 8: Optimizing your Twitter Card for better results
Once you have monitored and analyzed the engagement metrics of your Twitter Card, it’s time to optimize it for better results. By making strategic adjustments and optimizations, you can maximize the effectiveness of your card and drive even higher engagement and conversions. Here are some key steps to optimize your Twitter Card:

1. Update the visuals:
Visual elements play a crucial role in capturing users’ attention and driving engagement. Consider refreshing or updating the visuals of your card to ensure they align with your brand identity and are visually appealing. Test different images or videos to see what resonates best with your target audience.
2. Refine the headline and description:
The headline and description of your Twitter Card should be compelling and clearly convey the value or message you want to communicate. Make sure they are concise, and attention-grabbing, and highlight the key benefits or features of your card.
3. Test different call-to-action buttons:
The call-to-action (CTA) button on your Twitter Card can significantly impact user engagement and conversions. Experiment with different CTAs, such as “Buy Now,” “Learn More,” or “Sign Up,” to see which one generates the highest click-through rate. Make sure the CTA is clear, actionable, and aligned with your desired user action.
4. Optimize targeting:
Targeting plays a crucial role in reaching the right audience and driving relevant engagement. Review your targeting settings and ensure they are aligned with your target demographic and audience interests. Consider experimenting with different targeting parameters to expand your reach or narrow it down to a more specific audience.
5. Utilize hashtags and mentions:
Including relevant hashtags and mentions in your Twitter Card can enhance its discoverability and increase the chances of it being seen by a wider audience. Research popular hashtags and mentions in your industry or niche and incorporate them strategically in your card’s content.
6. A/B test different variations:
A/B testing is a powerful optimization technique that allows you to compare different variations of your Twitter Card to identify the most effective elements. Test different headlines, visuals, CTAs, or targeting strategies, and measure their impact on engagement metrics. Use the data gathered from A/B testing to refine and iterate on your card for continuous improvement.
7. Stay up-to-date with Twitter trends and features:
Twitter is constantly evolving, introducing new features, and adapting to current trends. Stay informed about the latest updates and trends on the platform to leverage them for your Twitter Card optimization. Experiment with new features or trends to stand out and engage your audience.
8. Leverage audience feedback:
Pay attention to the comments, replies, and mentions you receive on your Twitter Card. User feedback can provide valuable insights into what is working well and what needs improvement. Consider incorporating user suggestions or addressing their concerns to enhance the user experience and drive better results.
By following these optimization steps, you can ensure that your Twitter Card is optimized for maximum engagement, visibility, and conversions. Continuously monitor and analyze the performance of your card and make data-driven adjustments to stay relevant and effectively engage your target audience on Twitter.
Step 9: Promoting your validated Twitter Card
Congratulations on validating your Twitter Card! Now that your card is optimized for better engagement and results, it’s time to promote it to reach a wider audience and drive higher conversions. Here are some key steps to effectively promote your validated Twitter Card:

1. Utilize paid promotion:
Consider investing in paid advertising on Twitter to boost the visibility of your card. Twitter offers various advertising options, such as Promoted Tweets or Promoted Trends, that can help you reach a larger audience and increase engagement. Set a budget, define your target audience, and create compelling ad content to attract attention and drive clicks.
2. Collaborate with influencers:
Identify influencers in your industry or niche who align with your brand values and target audience. Reach out to them and propose a collaboration where they promote your Twitter Card to their followers. Influencers have a dedicated and engaged following, which can significantly enhance the reach and impact of your card.
3. Cross-promote on other platforms:
Leverage your presence on other social media platforms or marketing channels to promote your Twitter Card. Share the link to your card on platforms like Facebook, LinkedIn, or Instagram, and encourage your followers to engage with it. Consider creating dedicated posts or ads specifically designed to drive traffic to your Twitter Card.
4. Engage with relevant communities:
Join relevant Twitter communities, such as industry-specific chat groups or forums, and actively participate in discussions. Share insights, provide value to the community, and subtly promote your Twitter Card when it aligns with the conversation. Building relationships and credibility within these communities can lead to increased visibility and engagement for your card.
5. Utilize email marketing:
Leverage your email subscriber list to promote your Twitter Card to your existing audience. Craft a compelling email campaign highlighting the value or benefits of your card and include a direct link to it. Encourage your subscribers to share the card with their networks to further amplify its reach.
6. Tap into current events and trends:
Stay updated with current events, trends, or relevant hashtags on Twitter. Identify opportunities where your Twitter Card can add value or contribute to ongoing conversations. By aligning your card with trending topics, you can attract attention and engage with a larger audience.
7. Implement a referral program:
Encourage your audience to promote your Twitter Card through a referral program. Offer incentives or rewards for users who share your card and generate engagement or conversions. This can incentivize your audience to become brand ambassadors and organically promote your card to their networks.
Remember to continuously monitor the performance of your promoted Twitter Card and make data-driven adjustments when necessary. Analyze engagement metrics, track conversions, and measure the impact of your promotion efforts. By consistently refining your promotion strategy, you can maximize the visibility and effectiveness of your Twitter Card to achieve your marketing goals.
Boosting engagement and reaping the rewards
Congratulations on successfully validating your Twitter Card and implementing effective promotion strategies. Now it’s time to focus on boosting engagement and reaping the rewards of your efforts.

Here are some key steps to maximize engagement and achieve your marketing goals:
1. Foster meaningful interactions:
Encourage your audience to engage with your Twitter Card by asking thought-provoking questions, running polls or surveys, and encouraging them to share their opinions or experiences related to your card’s content. Respond to comments and engage in conversations to create a sense of community and build rapport with your audience.
2. Utilize multimedia content:
Enhance the visual appeal of your Twitter Card by incorporating captivating images, videos, or GIFs. Visual content tends to attract more attention and can effectively convey your message to your audience. Experiment with different types of multimedia content to find what resonates best with your audience and drives higher engagement.
3. Leverage hashtags:
Use relevant and popular hashtags in your tweets to increase the discoverability of your Twitter Card. Research trending hashtags in your industry or niche and incorporate them strategically into your tweets. This can help you reach a wider audience and tap into ongoing conversations related to your card’s content.
4. Encourage sharing and retweeting:
Include a clear call-to-action in your tweets, urging your audience to share or retweet your Twitter Card. Make it easy for them to share by providing retweet buttons or using retweet-friendly language in your tweets. The more your card is shared, the wider your reach will be, leading to increased engagement and visibility.
5. Analyze and optimize:
Regularly analyze the performance and engagement metrics of your Twitter Card using Twitter Analytics or other social media analytics tools. Pay attention to metrics such as impressions, click-through rates, retweets, and likes. Identify patterns or trends in the data and use them to optimize your content, timing, and promotion strategies for better results.
6. Collaborate with influencers:
Continue leveraging influencers in your industry or niche to promote your Twitter Card. Consider inviting them to participate in live chats or Q&A sessions related to your card’s content. Their presence and endorsement can significantly boost engagement and increase the credibility of your card.
7. Run contests or giveaways:
Organize contests or giveaways that are aligned with your card’s content. Encourage your audience to engage with your card by participating in the contest or giveaway. This can generate excitement and incentivize them to share your card with their networks, leading to increased visibility and engagement.
8. Measure and track conversions:
Use tracking tools like UTM parameters to measure the impact of your Twitter Card on website traffic, conversions, or other desired actions. Monitor the performance of your card’s link and assess its contribution to your overall marketing objectives. Use this data to refine your promotion strategies and optimize your card for maximum conversions.
By following these steps and continuously monitoring and refining your engagement strategies, you can maximize the effectiveness of your Twitter Card, reach a wider audience, and achieve your marketing goals. Remember, engagement is key to building a strong online presence and driving tangible results.
Elevate Your Twitter Card Validation with ViralDashboard
When it comes to validating Twitter Cards and boosting engagement, ViralDashboard, the AI-powered Social Media Management tool, is your secret weapon. It simplifies account management, offers seamless content scheduling, provides real-time analytics, keeps you updated on trends, and suggests engagement-boosting strategies. If you’re ready to enhance your Twitter Card game, ViralDashboard is your go-to solution. Sign up today and experience the difference!
Conclusion
In conclusion, validating your Twitter Card and implementing effective promotion strategies can significantly enhance your Twitter presence and boost engagement. By following the 10 easy steps outlined in this guide, you can maximize the impact of your Twitter Card and achieve your marketing goals.
Fostering meaningful interactions with your audience, utilizing multimedia content, leveraging hashtags, and encouraging sharing and retweeting are just some of the key strategies to boost engagement. Analyzing and optimizing your Twitter Card’s performance, collaborating with influencers, running contests or giveaways, and measuring and tracking conversions are additional tactics that can further enhance your results.